Denoise Images Without Losing Detail – Before and After Guide

Digital photography has made it easier than ever to capture life’s best moments. But not every photo comes out perfect. In low light, with high ISO settings, or on older devices, your pictures might have a grainy or “noisy” look. Noise can make a beautiful image appear blurry, harsh, or low-quality.
The challenge? Removing noise without destroying important details like texture, edges, and fine patterns. That’s exactly what this Denoise Images Without Losing Detail – Before and After Guide is all about.
By understanding noise, learning the right denoising techniques, and comparing before-and-after results, you can make your photos look sharper and more professional — without sacrificing clarity.
What Is Image Noise?
Image noise is the random grain or speckling that appears in digital photos, especially in darker areas. It’s caused by various factors:
- High ISO settings on your camera.
- Low-light conditions where the sensor struggles to capture enough light.
- Small camera sensors found in many smartphones.
- Over-processing during image editing.
In the past, reducing noise often meant blurring the whole photo — which removed details you wanted to keep. Today, with better tools and smart techniques, we can denoise images without losing detail.
Why Preserving Detail Matters
While removing noise is important for a clean image, details give photos their realism and depth. Think about:
- Skin texture in portraits.
- Individual hair strands in close-ups.
- Fine patterns on clothing or architecture.
If these details vanish during denoising, the photo can look fake or overly “plastic.” That’s why the goal is balance: remove the noise while keeping the original texture.
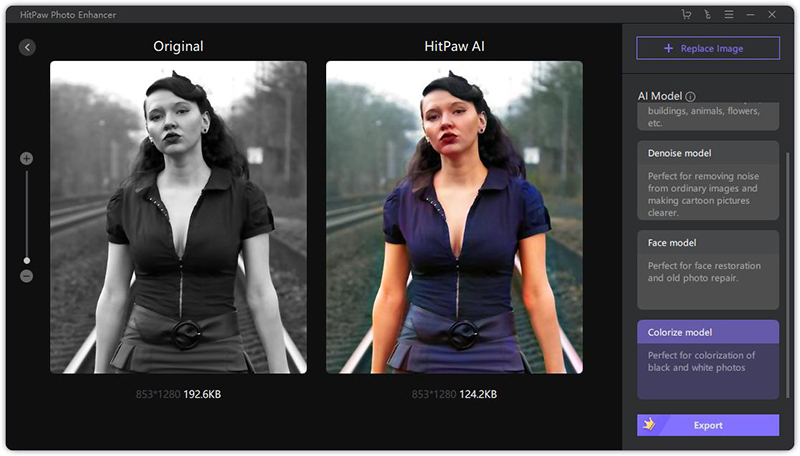
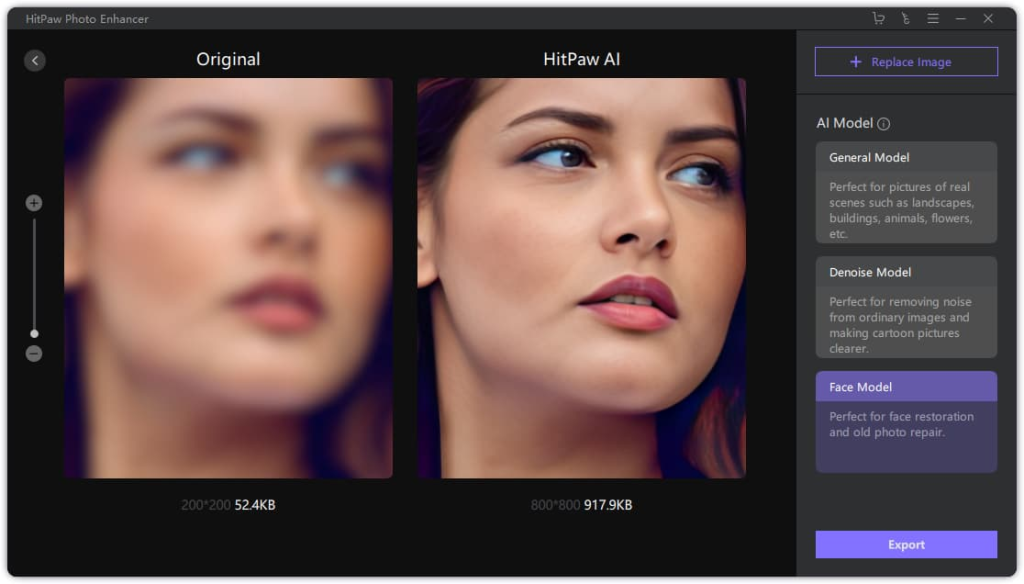
How Modern Tools Make Denoising Smarter
Modern denoising software uses AI and machine learning to separate noise from real details. Instead of applying a uniform blur, these tools analyze the image pixel by pixel.
They can:
- Recognize edges and lines to keep them sharp.
- Identify textures like skin or fabric and maintain their natural look.
- Remove color blotches without affecting brightness or contrast.
This means the before-and-after difference is dramatic — clean, smooth images that still look real.
Choosing the Right Tool for Denoising
There are many options available, from professional software to free apps. Here are some popular ones for a Denoise Images Without Losing Detail – Before and After Guide:
- Adobe Lightroom – Great for photographers who need batch editing.
- Topaz DeNoise AI – Powerful AI-based noise reduction.
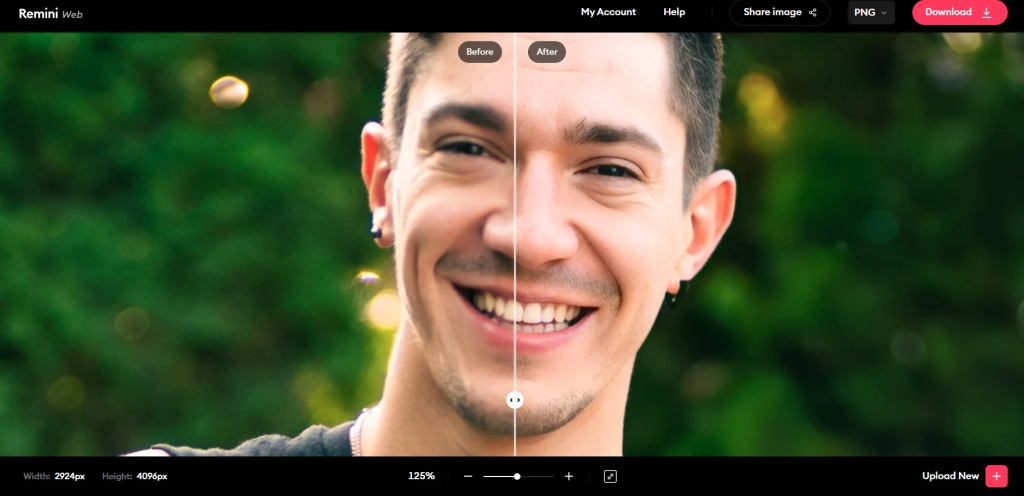
- Remini – Mobile-friendly for quick enhancements.
- Capture One – Excellent for color and detail control.
- ON1 NoNoise AI – Simple yet effective for beginners.
The right choice depends on whether you need quick results or detailed manual control.
Best Practices for Noise Reduction Without Losing Detail
When working on noise reduction, here are some expert tips:
- Work in high resolution – More pixels give you more control over detail.
- Zoom in and out – Check your image at 100% and full view to ensure balance.
- Use selective masking – Apply noise reduction only where needed.
- Adjust luminance and color noise separately – These two types of noise behave differently.
- Don’t overdo it – Too much denoising can make the image look flat.
Before and After: The Real Impact
In this Denoise Images Without Losing Detail – Before and After Guide, seeing the difference is key.
- Before: Grain covers skin and background, making the photo look rough.
- After: Smooth skin tones, clean backgrounds, but all facial details remain intact.
This transformation is especially important for portraits, night photography, and product shots — where clarity matters most.
When to Use Denoising
Not every photo needs noise reduction. Use it when:
- You’ve shot at high ISO in low light.
- The image is for professional or print use.
- Background noise distracts from the subject.
Sometimes, a little noise can even add character — especially in black-and-white or vintage styles.
Avoiding Common Denoising Mistakes
Even experienced editors can run into problems. Here’s what to watch out for:
- Over-smoothing skin – Makes people look unrealistic.
- Blurring important edges – Can ruin text or sharp objects.
- Applying the same settings to every photo – Each image is different.
- Ignoring the background – Sometimes noise hides in out-of-focus areas.
Combining Denoising with Other Edits
For the best results, noise reduction should be part of a bigger editing process:
- Start with noise removal to clean up the image.
- Sharpen important areas like eyes or objects.
- Adjust color and contrast for natural tones.
- Crop or reframe if necessary.
This ensures your final image is polished from start to finish.
How Safe Is Remini? Privacy and Security Explained
How AI Denoising Changed Photography
Ten years ago, denoising was purely manual and often damaging. Now, AI-powered tools understand what’s noise and what’s detail, giving results we couldn’t dream of before.
For example, AI can:
- Recognize a person’s face and protect its natural lines.
- Differentiate between fabric texture and random grain.
- Learn from millions of images to apply the best possible cleanup.

Why This Matters for All Creators
Whether you’re a photographer, designer, social media manager, or hobbyist, denoise images without losing detail can elevate your work. Clean, clear visuals:
- Attract more attention online.
- Look better in print.
- Build trust with clients.
A noisy, low-quality image sends the wrong message — but a denoised, detailed one shows professionalism.
Final Thoughts
Noise is a reality of digital photography, but it doesn’t have to ruin your shots. With modern AI tools and the right techniques, you can achieve clean, beautiful images that still feel real.
The key is balance: reduce the noise, protect the detail. The Denoise Images Without Losing Detail – Before and After Guide is proof that, with the right approach, you can transform grainy photos into crisp, eye-catching masterpieces without sacrificing quality.